Chocolate Cake With Olive Oil
Highlighted under: From Batter to Bliss
When I first made this Chocolate Cake with Olive Oil, I was surprised by how moist and rich it turned out. The olive oil not only adds a wonderful depth of flavor but also keeps the cake incredibly tender. I love how this recipe combines the classic chocolate experience with a twist that makes it unique and memorable. Whether for a special occasion or just a weekend treat, this cake delivers indulgence with every slice, and I can’t wait to share it with you!
When I baked this Chocolate Cake with Olive Oil, I was skeptical about using oil instead of traditional butter. However, I was amazed at the result! The olive oil not only enhances the chocolate flavor but also gives the cake a light, airy texture that I absolutely love. It’s a delightful alternative that keeps the cake moist for days.
One tip that made a huge difference for me was using high-quality cocoa powder; it really elevates the cake’s chocolaty richness. Don’t rush it—allow the cake to cool completely before serving, as this helps deepen the flavors even more. Trust me, it’s worth the wait!
Why You'll Love This Recipe
- Rich chocolate flavor paired with fresh olive oil notes
- Incredibly moist and tender texture
- Simple to make, perfect for any occasion
The Role of Olive Oil
Using olive oil in this chocolate cake lends a unique flavor profile that subtly enhances the richness of the chocolate. The fruity undertones of the olive oil complement the cocoa, creating a more complex taste experience. Moreover, olive oil contributes to the cake's moistness, ensuring that each slice remains tender and fluffy. I’ve found that opting for a high-quality extra virgin olive oil delivers the best results, as the flavor will shine through without overpowering the chocolate.
Not only does olive oil improve flavor and texture, but it also serves as a healthier fat alternative compared to butter. This not only reduces cholesterol levels but also adds antioxidants. If you're looking for a buttery flavor without using dairy, you can experiment with light-tasting oils, like avocado or sunflower oil, though the taste will be different.
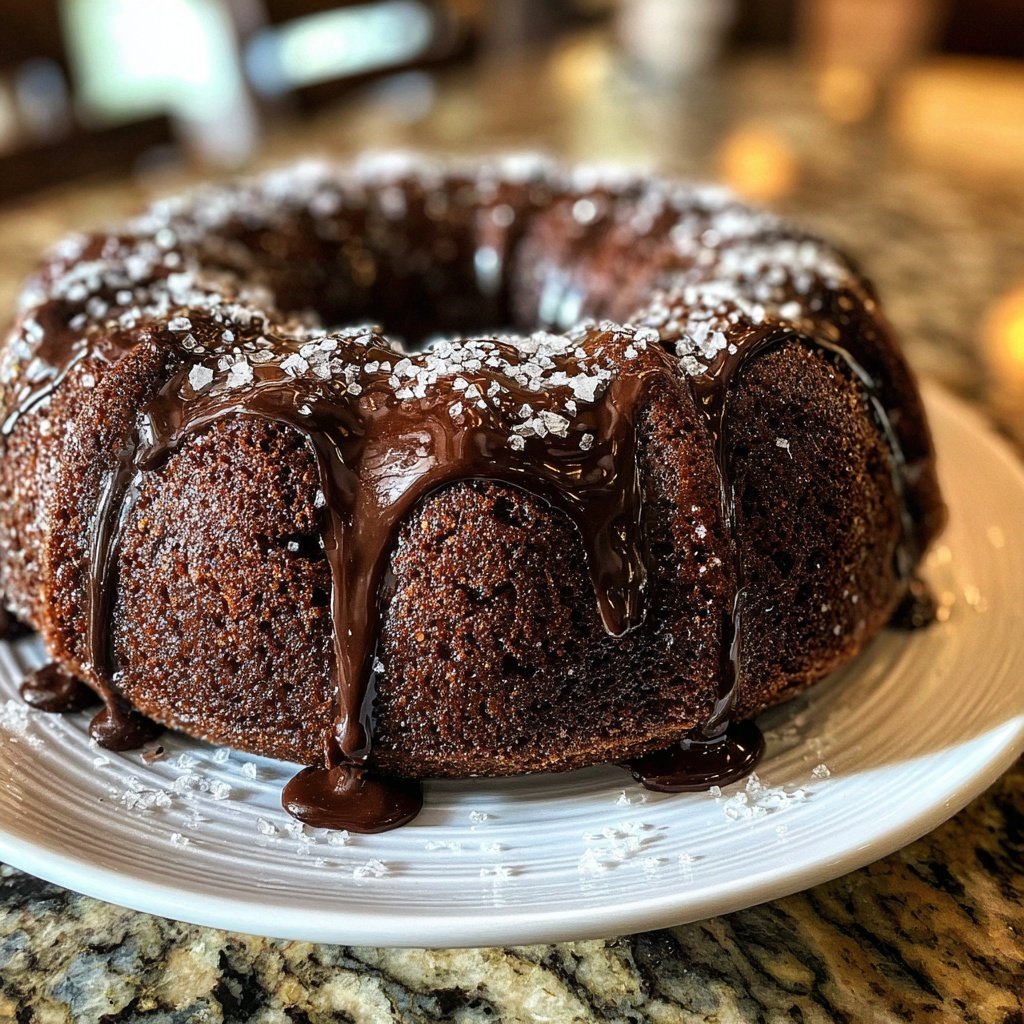
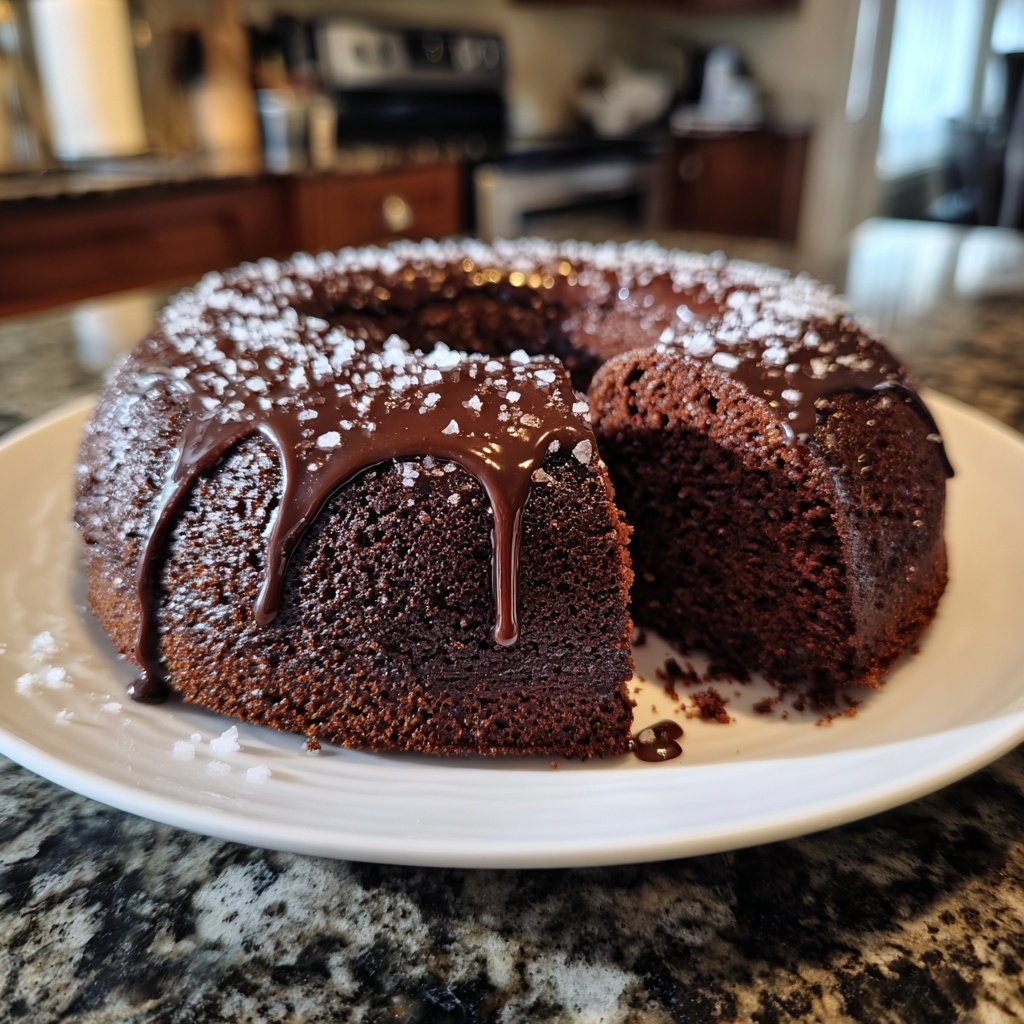
Tips for Perfect Ganache
When preparing the optional ganache, the key is to ensure your heavy cream is heated just to a simmer, avoiding boiling. Boiling can lead to a separation of fats and create a grainy texture in the ganache. Stirring in the chocolate gradually and being patient until it fully melts results in a smooth, glossy finish that perfectly complements the richness of the cake. If your ganache isn’t velvety, try whisking in a bit more warm cream until you achieve your desired texture.
For additional variety, consider adding flavors to your ganache. A splash of espresso powder or a dash of sea salt can enhance richness, while a splash of orange or peppermint extract can transform the flavor profile entirely. You can pour the ganache while it’s still warm for a glossy finish or refrigerate it for a thicker coating, allowing you to create different textures and presentations.
Serving and Storing Your Cake
Once assembled, this chocolate cake is perfect for various occasions, from birthday celebrations to casual gatherings. I suggest serving it with a scoop of vanilla ice cream or a dollop of whipped cream to balance the rich chocolate flavor. Fresh berries, like raspberries or strawberries, can add a refreshing tartness. If you're feeling adventurous, try drizzling a bit of caramel sauce over the top for an added layer of sweetness.
If you have any leftovers, store the cake in an airtight container at room temperature for up to three days. For longer storage, wrap individual slices tightly with plastic wrap and freeze for up to three months. To enjoy, simply thaw at room temperature for a few hours or warm briefly in the microwave for a comforting treat that still tastes fresh.
Ingredients
Ingredients
For the Cake
- 1 ¾ cups all-purpose flour
- 1 ½ cups granulated sugar
- ¾ cup unsweetened cocoa powder
- 1 teaspoon baking soda
- ½ teaspoon salt
- 2 large eggs
- 1 cup olive oil
- 1 cup buttermilk
- 2 teaspoons vanilla extract
- 1 cup boiling water
For the Ganache (optional)
- 1 cup heavy cream
- 8 ounces dark chocolate, chopped
- 1 tablespoon olive oil
Make sure all ingredients are at room temperature before starting for the best results!
Instructions
Instructions
Preheat the Oven
Preheat your oven to 350°F (175°C) and grease two 9-inch round cake pans.
Mix Dry Ingredients
In a large bowl, whisk together the flour, sugar, cocoa powder, baking soda, and salt.
Combine Wet Ingredients
In another bowl, beat the eggs, then mix in olive oil, buttermilk, and vanilla extract.
Combine and Pour
Gradually add the wet ingredients to the dry ingredients, mixing until just combined. Stir in boiling water until smooth. Pour the batter evenly into the prepared pans.
Bake
Bake for 30 minutes or until a toothpick inserted in the center comes out clean. Let the cakes cool in the pans for 10 minutes before transferring to wire racks to cool completely.
Prepare Ganache (optional)
In a saucepan, heat the heavy cream until just simmering. Remove from heat and add the chopped chocolate and olive oil. Stir until smooth and glossy.
Frost the Cake
Once the cakes are completely cool, place one layer on a serving platter, spread ganache on top, and then add the second layer. Pour remaining ganache over the top and let it drip down the sides.
For an extra touch, garnish with chocolate shavings or fresh berries!
Pro Tips
- For an even deeper chocolate flavor, consider adding a teaspoon of espresso powder to the dry ingredients.
Troubleshooting Common Issues
One common issue that can arise is a dry cake. To prevent this, ensure that you accurately measure your flour, as too much can lead to a dense texture. Additionally, the incorporation of boiling water into the batter plays a crucial role in achieving the perfect moisture level. If your cake doesn’t rise as expected, double-check that your baking soda is fresh; expired leavening agents can hinder the rise.
Another problem might be the cake sticking to the pans. To counter this, thoroughly grease your cake pans and consider using parchment paper on the bottom. When the cakes are cool, carefully run a knife along the edges to loosen before inverting them onto racks.
Scaling the Recipe
This chocolate cake recipe is easily scalable, which is perfect for larger gatherings. If you're doubling the recipe, ensure you mix the wet ingredients in a larger bowl and adjust the baking time slightly. Check for doneness at the original time, but be prepared for it to take an additional 5-10 minutes if using larger pans.
For smaller gatherings, you can halve the recipe and use smaller cake pans, such as 6-inch rounds. Just remember, smaller cakes may bake quicker, so start checking for doneness around 20 minutes.
Variations to Try
While this chocolate cake is wonderful as is, consider adding mix-ins for a new twist. Chopped nuts, like walnuts or pecans, can add great texture. Alternatively, swirling in peanut butter or Nutella can infuse a delightful new layer of flavor to the batter before baking.
If you're looking for a different flavor profile entirely, try substituting half the cocoa powder with finely ground espresso or coffee for a mocha cake, or adding spices like cinnamon or chili powder to enhance the chocolate flavor.
Questions About Recipes
→ Can I use a different type of oil?
Yes, but olive oil gives a unique flavor and moisture that's hard to replicate.
→ How should I store the leftover cake?
Store covered at room temperature for up to 3 days or refrigerate for a week.
→ Can I make this cake ahead of time?
Absolutely! You can bake and freeze the layers, then frost when ready to serve.
→ Is this cake suitable for vegans?
You can replace the eggs with flax eggs or apple sauce for a vegan version.
Chocolate Cake With Olive Oil
Created by: Sabrina Holt
Recipe Type: From Batter to Bliss
Skill Level: Intermediate
Final Quantity: 8 servings
What You'll Need
For the Cake
- 1 ¾ cups all-purpose flour
- 1 ½ cups granulated sugar
- ¾ cup unsweetened cocoa powder
- 1 teaspoon baking soda
- ½ teaspoon salt
- 2 large eggs
- 1 cup olive oil
- 1 cup buttermilk
- 2 teaspoons vanilla extract
- 1 cup boiling water
For the Ganache (optional)
- 1 cup heavy cream
- 8 ounces dark chocolate, chopped
- 1 tablespoon olive oil
How-To Steps
Preheat your oven to 350°F (175°C) and grease two 9-inch round cake pans.
In a large bowl, whisk together the flour, sugar, cocoa powder, baking soda, and salt.
In another bowl, beat the eggs, then mix in olive oil, buttermilk, and vanilla extract.
Gradually add the wet ingredients to the dry ingredients, mixing until just combined. Stir in boiling water until smooth. Pour the batter evenly into the prepared pans.
Bake for 30 minutes or until a toothpick inserted in the center comes out clean. Let the cakes cool in the pans for 10 minutes before transferring to wire racks to cool completely.
In a saucepan, heat the heavy cream until just simmering. Remove from heat and add the chopped chocolate and olive oil. Stir until smooth and glossy.
Once the cakes are completely cool, place one layer on a serving platter, spread ganache on top, and then add the second layer. Pour remaining ganache over the top and let it drip down the sides.
Extra Tips
- For an even deeper chocolate flavor, consider adding a teaspoon of espresso powder to the dry ingredients.
Nutritional Breakdown (Per Serving)
- Calories: 380 kcal
- Total Fat: 26g
- Saturated Fat: 15g
- Cholesterol: 195mg
- Sodium: 85mg
- Total Carbohydrates: 32g
- Dietary Fiber: 3g
- Sugars: 24g
- Protein: 6g